 When I started this blog thought that I’d write about each project as it wrapped up. Since then I’ve realized that this approach really misrepresents the reality of an extensive renovation like the one we are undertaking. At any given time we have multiple projects underway. Some proceed along day by day, but more happen more haltingly with delays while things dry, while we wait for special order supplies, while we wait for trades to work us into their schedule, and of course those times when our own lives interfere.
Starting with this blog I’ll write more often, updating the many projects we have ongoing rather than waiting for each to wrap up. It should be more representative of the actual reality of swirling chaos with which we are surrounded!
Garage – painting done!
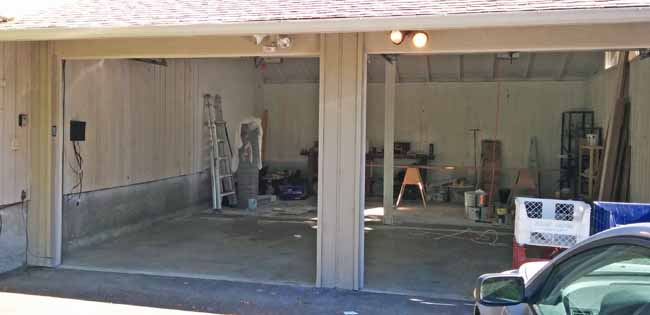
When we bought the house the garage had an enclosed workshop at its rear. There was only a single door allowing entry and it had a low ceiling. It was dark and filled with discarded junk left by the previous owner. The garage was stained a dark brown tone that made it gloomy even with sunshine streaming in through the large triangular windows on the gable wall of the roof.

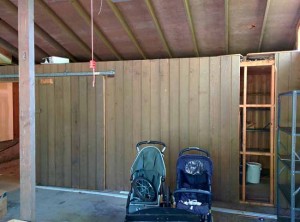
The first order of business was to get a dumpster delivered so that we could dispose of the junk and the demolition debris from the garage and other projects. Just removing the junk (including an old and broken exercise machine, a stroller, and two baby running carriers) filled almost a third of the large dumpster.
Most of the junk as easily disposed of by a quick toss into the dumpster, but the 45 old cans of paint are a continuing problem. Latex paint can be thrown away in the trash, but only if it is dried and hardened. A few of the cans had only a little paint and dried quickly, unfortunately many of them were over half full and would never dry on their own. The paint and hardware stores sell a latex paint hardener, but it costs about $5 to harden one gallon of paint! Given that I had 40 cans of paint, including a couple of 5 gallon ones, I’d have had at least a couple of hundred dollars just in paint hardener. Instead I opted for the old standby…kitty litter. I’ve opened the cans and poured in generous amounts of kitty litter and stirred it in. Every couple of days I add a little more and stir up any of the still moist materials at the bottom of the cans. It seems to take about 2 weeks for a half gallon of paint to get dry enough to pass the red-face test to put it out with the trash.
The oil based paints and stains are more of a problem as they have to be held until one of the household hazardous waste events. As a side note, in Bellingham one can donate usable leftover latex paints over 1/2 gallon to the Habitat for Humanity Re-Store. Unfortunately all of the paint I inherited was old and of questionable usability.
There were lights, switches, and an outlet in the workshop wall, so prior to demolition I had to shut off the power and disconnect those power lines. While do that I was distressed to learn that the only power source in the garage was the lighting and door open circuit. It turned out the wall outlet was actually an extension cord plugged into the door opener supply and stapled to the wall! Yikes! I guess when the electrician comes to visit he’ll be adding a couple of circuits to the garage.
A coat of white paint on walls and ceiling has really made the garage a much nicer place to work!
Banish Popcorn (Ceilings)
I had thought to wait a while before fixing up and repainting the two bedrooms we will use for guests, but Heather (the Admiral) rightly reprioritized my plans. The first task in the bedrooms was to remove the 70s vintage mirrored sliding closet doors and dreary splotchy paint in one room and intense bright yellow paint in the other. But the most important task was to eliminate the textured popcorn ceilings. It is hard to imagine that anyone ever thought popcorn ceilings were a good idea. They make rooms feel smaller and are great for holding dust and grime…yuck!

I had read that there was a scraper tool specially made for removing ceiling texture, but despite asking several workers at our local Lowe’s I couldn’t find one. As it worked out I discovered an unused one in the rubble left in the garage by the previous owner. But that came after I had already finished scraping the first of two ceilings.
The process starts with protecting the floors with a layer of ramboard (a thin cardboard that comes in rolls) and a layer of plastic sheeting taped down around the edges. The textured ceiling is then sprayed with a small amount of warm water. I like to use a pressurized garden sprayer for this job. After waiting a few minutes the texture softens and can be scrapped off. If one is careful and the ceiling isn’t too wet the texture can be removed without damaging the underlying sheetrock or the joint tape. The trick here is to get the right amount of moisture on the texture without getting enough to soften the paper on the sheetrock. Any errors at this point will have to be repaired before the ceiling paint is applied. Using a regular wide scraper works okay, but does require many many trips up and down the ladder.
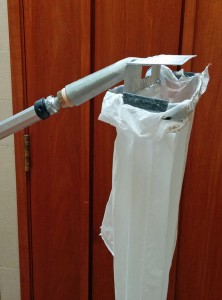
For the second room I used the newly unearthed ceiling scraper. This tool is an angled scraper blade with a metal frame mounted a little below. The scraper screws onto a standard extension pole. One can attach a plastic bag to the frame to catch the texture as it is scraped. This does work well, but the bad must be emptied very frequently as the weight of the material scrapped quickly makes the tool too heavy to lift. I permanently attached a small garbage bad to the frame and dumped it into a trash barrel after ever couple of scrapes. It worked well and really reduced the amount of material that had to be cleaned up after the job was done.
After the popcorn was gone and the mess cleaned up I repaired holes in the ceiling from removed swag lamps and damage from the scraping. A coat of primer followed by two coats of ceiling paint, two coats of wall paint, and some trim paint on the crown molding and the rooms look much better.
The finishing touches of new trim and new doors will come next.
Beating Back the Jungle
Heather has decided to defeat her brown thumb and learn to take care of the landscape surrounding the house. One of the previous owners was a landscaper by trade so the gardens were extensive, and at one time well organized. Several years without careful maintenance has allowed all the plants to interpenetrate s they struggled for light and survival. Heather has retained Debra to work in the gardens and to teach her as they work together. The first step has been to cut back, prune, and in some cases, remove plants and trees that have grown too much. Some plants are getting relocated and a few removed entirely.
In just the first five or six days of work over 2500 lbs of compostible material has been hauled off!


